Tuesday, April 19, 2011

Best Focaccia Ever

Hey guys, I'm finally back! And I'm bringing with me a tasteful piece of the best focaccia you've ever ate. Oh wait, you didn't eat it - I did!

Garlic herb focaccia sandwich (with swiss cheese and ham) and focaccia sticks - Amazing!

Now, seriously, this is definitely one of the best breads I've ever tried. It's amazing to think that this was only my second official execution of a recipe from the book. This focaccia is so good that once it starts baking and releases the smell of fresh herbs and garlic into the air you will feel like you are inside an authentic "cantina italiana".

The secret here is the slow overnight fermentation, which increases the flavor and makes the bread really fluffy. Also very important is the flavored olive oil made with fresh herbs and garlic. I made this oil following the tips from the book, but I customized it by adding fresh minced garlic and some other spices. Since it's my creation, I can actually post the recipe here. You can use it to bake your own focaccia or as a tasty dipping for dinner rolls, ciabattas, etc.

To make the flavored olive oil, just simmer 1 cup of olive oil for 2 minutes and turn off the heat. Then add any herbs you like, preferably fresh (I added fresh parsley and scallions and dried oregano and basil), three cloves of minced fresh garlic and a pinch of cayenne pepper. Cover the pan and let it rest for at least 30 minutes to infuse the herbs and release their flavor into the oil.

Now, about the focaccia. Again, I can't publish the exact instructions and proportions from the book's recipe, so I'll just describe what I did and you can apply my tips to any focaccia recipe you might have.

Start with a base sticky mixture called "poolish", which is actually flour and water in the same proportion and a small amount of yeast. Mix everything and leave it fermenting at room temperature for 3 to 4 hours (or until it starts bubbling) and then immediately refrigerate it. Use it in the next day to make the dough, by adding more flour, yeast, salt, water and olive oil and mixing it until it forms a sticky smooth dough.

Transfer the dough to a bed of flour on the counter and apply the folding technique to develop the gluten. Let it relax and swell. In the meantime, line the bottom of a 17'' x 12'' baking sheet with parchment or wax paper and grease the paper with olive oil. When the dough is ready, transfer it to the baking sheet and start stretching it with your finger tips until it fills everything, taking care to keep as much air as possible inside the dough. Then, spread 10 tablespoons of our nice flavored olive oil over the dough and let it proof for 1 hour.

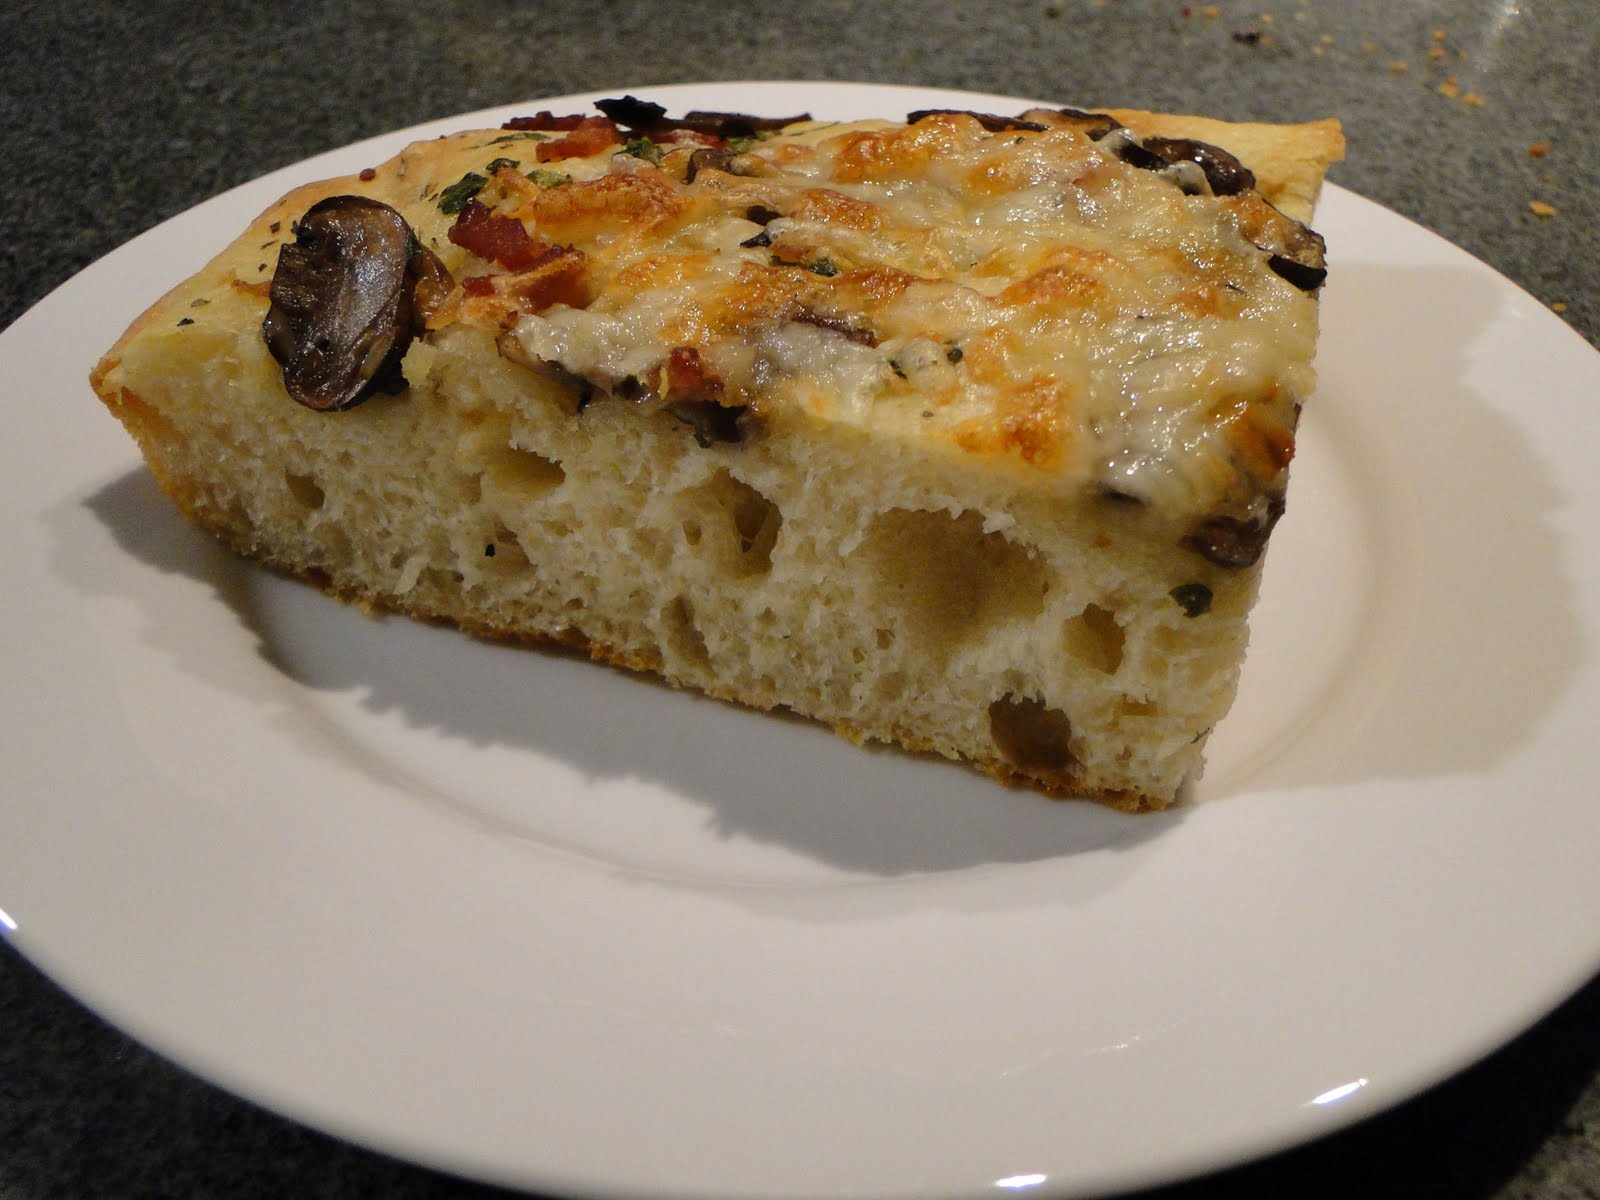
It should look like this, if you add saute mushrooms and minced bacon :)

Preheat the oven to 450 degrees Fahrenheit (230 degrees Celsius) and bake for 10 minutes. Turn the baking sheet 180 degrees. If you want to add a nice touch to your focaccia, add one cup of shredded mozzarella at this moment. Bake for 10 more minutes. Remove the focaccia from the oven and transfer it immediately to a cooling rack, making sure to remove the parchment paper from the bottom of the bread. Let it cool for 15 minutes and enjoy!


Overall, this focaccia was fantastic. It could, however, be improved by reducing the amount of olive oil (I already reduced it in the instructions above). It's a great bread to eat plain or to use as a base for a nice sandwich (first picture). You can also make some fluffy bread sticks with it that you can serve at a dinner party - your guest will definitely love them!

Baker's Rating: 9.0 / 10

Wife's Rating*: 9.0 / 10

(the version with a reduced amount of olive oil would most likely get a 10/10 rating from both my wife and I)

* My wife explicitly requested me to stop calling her "judge", so I'm officially renaming the "Judge's rating" to "Wife's rating". But I still think "judge's rating" keeps it more impersonal so you, my fellow readers, don't think she is giving these high ratings just because I'm her husband, which is probably very true! :)

Sunday, April 10, 2011

Cinnamon Buns

Dating back many years, it's public belief that cinnamon buns (or cinnamon rolls) originated in Sweden, where October 4 is known as National Cinnamon Bun Day. As almost every good bread, these once delicate buns arrived in the US some decades later and were disfigured and transformed into a buttered, sticky treat topped with fondant glaze - the way Americans like it.

Well, I can't say I wouldn't like a nice US-style cinnamon bun right now, but given the fact that I still have 37 other bread formulas to try and I am already a few (many) pounds overweight, I decided to lighten up this recipe a little bit. My first decision was to remove the fondant glaze. Yes, it tastes good, but it also brings many calories to the buns. My second decision was NOT to use butter in the cinnamon sugar mix that is used to fill the rolls. I was confident that the dough would be moist enough that the butter wouldn't be needed. In order to compensate for the flavor lost by removing both the fondant and butter, I decided to add sliced almonds to the cinnamon sugar mix.

These cinnamon buns were relatively quick to make - and that's the main reason I chose them as the first bread of the series, since I didn't have time to prepare a sponge, poolish or biga yesterday. Including all 10 stages of bread baking (as described in the book), this bread took me approximately 4 1/2 hours from start to finish, including a 2 hour fermentation and 1 1/2 hours of proofing. It is also a simple recipe that can be easily made using an electric mixer.

Start by creaming butter and sugar using the paddle attachment of your electric mixer. Then, add the egg and mix until smooth. Add flour, yeast, milk and lemon extract (I used vanilla extract) and mix for a couple of minutes. Switch to the dough hook attachment and beat for 10 minutes until the dough passes the membrane test. Put the dough in a bowl coated with vegetable oil, cover it with plastic wrap and let it ferment for 2 hours. After fermenting, shape the dough to a large rectangle (A) and spread the cinnamon sugar mix over it (B), rolling it up (C). Finally, cut the big roll into 3/4 inch buns and arrange them on a baking sheet covered with parchment or wax paper (D). Let the buns proof for 1 1/2 hours. Preheat the oven to 350 F and bake for 25 minutes. Let them cool for another 25 minutes and they will be ready to be tasted.

A - Shape the dough to a large rectangle
B - Spread the cinnamon sugar mix over the dough
C - Roll the dough up
D - Cut the big roll into small buns and place them on a baking sheet

Unfortunately, I can't publish the exact recipe and instructions here, since this would be a violation of copyright. If you are interested in this particular bread, I recommend you to buy the book and give it a try - you won't regret it.

Effective immediately, I've decided to give all breads a rating based on the baker's opinion: the "baker's rating". But don't get me wrong; If you own the book, you should definitely try all the recipes and decide for yourself which best suit your taste. I am also introducing another concept called the "judge's rating"; it will be a different rating given by someone else (usually my wife) based on the look, feel and taste of the bread, ignoring how many hours the baker (myself) was stuck in the kitchen to get it done.

Before announcing the ratings, I'd like to tell you a little bit about the resulting bread:


The buns were amazingly light and elastic, unlike usual US-style cinnamon buns. They also tasted great, without being too sweet. In fact, I think the balance between sugar, cinnamon and dough was perfect. I could have easily eaten 4 buns, but since I am trying to lose weight, I only ate 3!

And here are the final ratings for these charming "light" cinnamon buns:

Baker's Rating: 7.5 / 10

Judge's Rating: 9.0 / 10

And that is it for the cinnamon buns! Hopefully next week I'll be writing about "focaccia", a wonderful and versatile italian bread. Keep tuned!

Thursday, April 7, 2011

So, what is this all about?

First of all, I know I should keep my posts as brief as possible, but since this is my the first contribution to this newly created blog, I wanted to tell you a short story that explains why I decided to start sharing these experiences and what you can expect from this blog in my future updates.


So, here we are again. I've made several attempts to start blogging in the past, but for some reason I just couldn't keep up with it. Maybe I didn't have the time back then (but I still don't) or the subjects were poorly chosen. The fact is: none of my previous ideas resulted in a feasible, interesting blog. You must be asking yourself what's the difference now...

I've recently moved to Cambridge, MA from my home town in Brazil and, as you can imagine, it was a considerable change in all aspects of life; no family, no friends. Just my wife and I. Nevertheless, one of the things that didn't change was my passion for cooking. I just love how it makes me feel better when I dive my soul into this fascinating world. But back in Brazil I always struggled to find high-quality ingredients at a reasonable cost. Finding bread flour, for instance, was always disappointing.

I was enthusiastic when I first went groceries shopping at a local, relatively small market  in Boston (nothing like Walmart) and encountered a huge selection of flours of different kinds, brands and qualities. My first reaction was: I'll finally be able to make a decent home-made pizza. I remembered of a really nice dough recipe I had found a while ago that resulted in a decent pie, even by using all purpose flour. So, I had to give it a new try, but this time using an appropriate, high-gluten flour.

I bought the King Arthur Bread Flour, a nice italian extra-virgin olive oil (I always add olive oil to my pizza dough to give it a smooth texture and enhance its flavor), some fresh tomatos, herbs, cheese and all other ingredients that were required. When I got home I went straight to the kitchen and started preparing the dough, which had to be left fermenting slowly overnight in the refrigerator. In the next morning, I got a nice, thick pizza stone and a peel (I highly recommend both if you're serious about making good pizza). Finally, at that night, the magic happened: what an amazing pizza!

Chicken BBQ pizza: a little bit out of shape; I was still learning how to use the peel :-)

I was able to prove to myself that a good pizza can be achieved even if you don't have professional equipment  just by using high quality ingredients, the right recipe and the appropriate technique to closely reproduce the effects of a wood fired oven. The right recipe, in this case, was the pizza dough recipe mentioned above, which was originally published in "The Bread Baker's Apprentice", a book by Peter Reinhart. A concise version of the same recipe can be found here: http://www.101cookbooks.com/archives/001199.html.

Bread Baker's Apprentice

That successful pizza experience motivated me to buy the book and begin a wonderful journey through the world of breads. And here lies the main purpose of this blog: it's intended to tell you the stories behind all of my adventures through the recipes of "The Bread Baker's Apprentice". There are 38 different bread formulas, each one requiring a distinct technique and resulting in a very peculiar bread. I intend to attempt at least one different recipe every two weeks, so we should have more than one year of delightful breads and, most important, fun!

I hope you enjoy!